Showing posts with label Gluten Free Recipes. Show all posts

Saturday, January 30, 2016

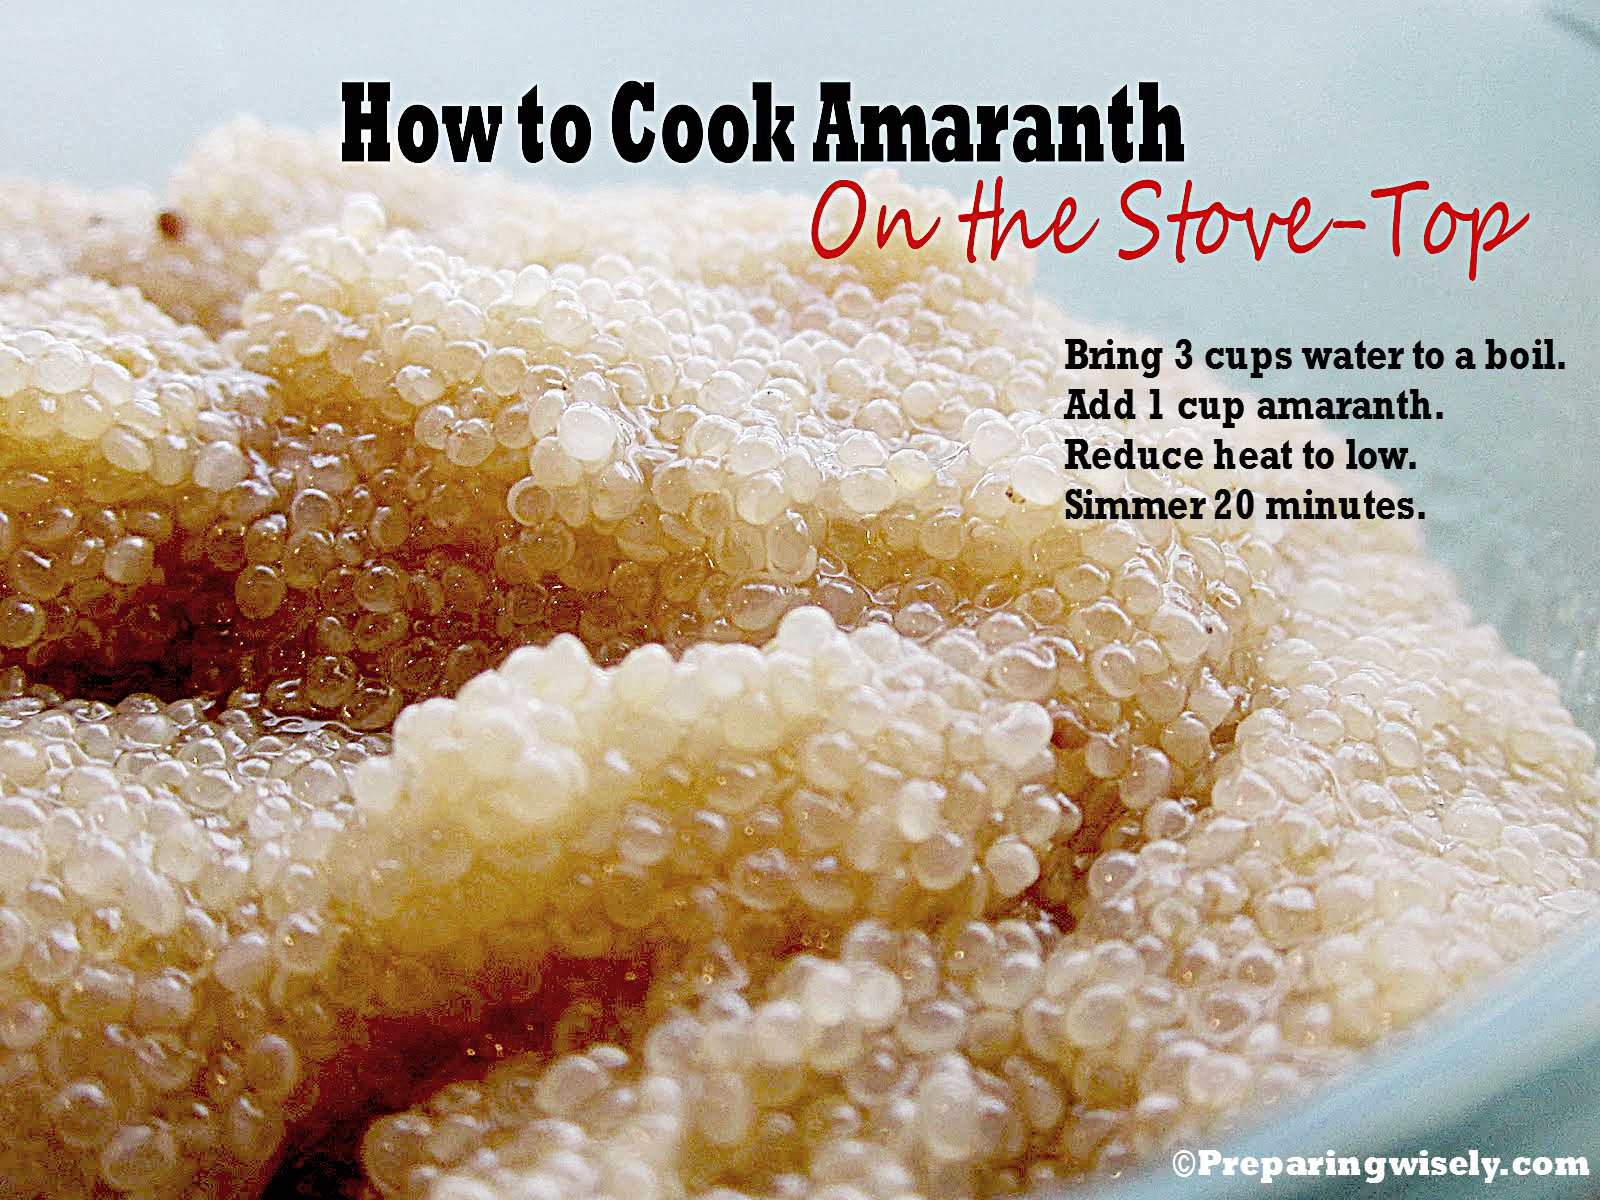
How to Cook Amaranth on the Stove Top


If you've been with me in the past you know of my absolute obsession with grains and getting to contribute here on Preparing Wisely's blog, I am going to be sharing a lot of those obsessions...as well as preparedness tips. The grain obsession started as a mild crush and now I'm totally addicted. Grain and seeds add such a remarkable depth to your meals. I'm a huge fan. So, it won't come as a surprise if I share some more basics here right? Meet Amaranth. My darling friend on the left. On the right we have brown teff.
If you've never had Amaranth, it's an amazing super-grain and one of my favorites. Now I call it a grain, but technically it's a seed. Not all seeds are grain. Only seeds that are members of the grass family can technically own the name of grain. It's a very fun and technical thing. The good news on amaranth is that it's gluten free, high in protein and has all necessary amino acids to be considered a complete protein...30% more protein than rice, wheat or oats. In it's glory, it can grow a million-ka-billion seeds (give or take). I find it  absolutely delightful and mild in flavor. It's become one of my favorites for breakfast. 
I'll simply cook it on the stove top and when it's cooked, drizzle it with a smidge of honey or even better, fold in some yogurt and fruit to the cooked grain.

It's simple to cook on the stove top. You will need a quart size sauce pan with a tightly fitting lid. Bring 3 cups water to a boil. I add a pinch of salt to the water. Add 1 cup of amaranth to the pot. Reduce heat to very low. Cover with a lid and allow the amarnath to simmer 25 minutes. The seeds are still rather small when cooked, but they look so ding-a-dang crazy-cool.
I love a little drizzle of honey. My personal favorite is a maple hazelnut honey.
Even though it looks like caviar, it doesn't taste like it. Hooray for that!

Here...now you can see it really close up.
My final note. My most recent love...freeze dried yogurt bites and freeze dried fruits folded into the cooked grain. Oh my stars. It's a creamy little nugget of joy in a sea of goodness. How's that for a cool new happy food?
There you go. Make some amaranth! 


  Always My Very Best,
Your Friend Chef 

Wednesday, June 22, 2011

Buckwheat and Teff Gluten Free Blender Pancakes


I had a request for a whole grain blender pancake that is gluten free. As always, I am happy to help, as I have many friend who deal with the whole "gluten free" issue. So, I thought I'd share that buckwheat is in fact 100% gluten free! It's awesome for pancakes and a powerhouse of nutrition. It's well worth using for pancakes.  So far, I love the soak overnight method best, even though it does actually work to just put the buckwheat in the blender unsoaked. I prefer to soak, as I know that this will aid the body in digestion of the grain.  
Here's my recipe:
1 cup buckwheat (soaked overnight in 3 cups water and drained)
1/2 cup Teff (if you don't know about this whole Super-grain...it's amazing!)
1/2 cup egg whites (this makes a fluffy amazing pancake Powdered Egg Whites can be used, hydrated )
20 drops stevia (see below)
1 tsp lemon or orange zest
1/4 tsp salt

In a blender, all the ingredients.

I LOVE the stevia we carry in the store. It's got a really clean flavor. The advantage of using this, opposed to using sugar is that it won't stick to your griddle...and it won't make you fat. Okay...it's a 100% natural sweetener that doesn't cook out on the griddle so it makes a supremely lightly sweet breakfast pancakes.

Blend on high for 3 full minutes, adding more water as needed to make a smooth batter. I didn't have to use any.
Cook on a lightly oiled hot griddle 2 minutes on each side until cooked through.
Yeah! You'll need some Maple Syrup!
There you go my gluten free friends! Buckwheat-Teff pancakes! Enjoy!

Thursday, May 26, 2011

Canning Homemade Salsa


Thursday, June 2nd, 6:30 PM I'll be teaching a 
Basics of Home Canning class with  at Preparing Wisely
(144 S Mesa Dr, Mesa, AZ) 

I was on on Valley Dish  Tuesday making Skillet Enchilada Casserole . It's not only awesome in the Dutch oven while camping, but also amazing any night of the week.  I made the skillet meal using some of my homemade roasted tomato salsa, I thought it would be perfect to share the recipe here today! What do you think? Salsa season? Um yes!  Especially since the salsa I love and use has been completely depleted  by my salsa freak  adoring husband. Normally that is okay, but when I'm thinking I have a certain ingredient only to find it snorted down and gone...well let's just say I was a little flustered.  I needed to make some anyway, right?! Okay. Perk for you! I'm sharing the recipe. See...something good has come from Ace loving salsa...besides a tortilla chip famine. 
 Remember when I was hard core working on Organic Tomato Farming with Jim and I had a bazillion of these? Well, I think we're heading that way again.  If you don't have access to tons of tomatoes you grow personally, there's always the farmer's markets and local veggie stands. 

I came up with a recipe back  that made Ace literally drink bottles of salsa. He's a salsa boy. Honestly I couldn't decide if I wanted to share the recipe here on the blog or save it for bottling and selling across the country or at farmer's markets. Um...yes, we like it that much. However, I think it's safe to say that I can share a version here that's so close it's almost it...but not give away all my tricks, right?  It's a medium heat salsa I custom designed for Ace who doesn't like a lot of cilantro in his salsa. I'm a cilantro girl. I like a lot of chunks in my salsa too, but if you prefer a smoother salsa, you'll need to puree it. Ace also doesn't like, ironically, a lot of peppers in his salsa, so this one have very few. I roasted my tomatoes in the solar oven and then finished cooking the salsa on the stove. 

 Home Canning Safety 101 is a good place to start if you've never done any home canning. You'll need some equipment for this if you want it to be safe to feed to your family after sitting on the shelf.  


Chef Stephanie Petersen's 
Roasted Tomato Fajita Salsa

6 lb  blanched tomatoes , peeled half pureed, half rough chopped
2 medium onions, diced (1T olive oil)
1/4 cup minced garlic
1/2 cup roasted mild Hatch green chiles, peeled and seeded
3/4 cup apple cider vinegar
1T fresh cracked black pepper
2tsp fresh ground coriander seeds
1T salt
2T dry cilantro

Directions:
In a heavy 2 gallon stock pot over high heat. Add olive oil. Put onions in pan. Do not stir for 5 minutes until one side of the onions are very dark brown (as you would for fajitas). Add the garlic and cook 2-3 minutes.  Add all remaining ingredients. Simmer 20 minutes uncovered until thickened. Place salsa in sterile canning jars with 1/2 inch head space. Process 15 minutes for pints and 20 minutes for quart jars.


Hide them from Ace.  Share them with the ones you love. 

 There you go. If you go camping often, make the Enchilada Tortilla Casserole in the skillet. Tuesday's show recipes are here. The enchilada skillet meal is amazing for the fact that it's fast, easy and daggumit...a freakin' awesome family favorite!  Anyone can make it!  

Monday, May 9, 2011

Homemade Gravy Mix (gluten free)


It's mix making Monday and I have a sneaking suspicion this is one that can really save a lot of people some hard earned cash. How much do you pay for gravy mix? It's so easy to make and so painfully cheap that once you see it, you will be shocked! It only takes a few minutes to make several of these gravy mixes and from all the sauce and soup classes I have had, this is the one mix that people say they use the most. Home basic gravy is a great skill to have. I've seen a lot of money go down the drain for those store bought convenience foods like gravy mix. Why? Most of them have flat flavor, no frills. If you look at the ingredients list, it seems like it could be much shorter. Am I right? This mix I make is still loaded with good complex flavors, but it's also quick. It's a good marrying of basic meets a bit of gourmet. My gravy isn't super thick like pudding. It's thick enough to coat the back of a spoon nicely. If you want thicker gravy, you will need to double the flour. For the best complex flavor I add my all purpose seasoning in place of the pepper, thyme, and celery seed (there's a lot more spices and herbs in mine). I always use the bay leaf. It not only adds great flavor, but is a natural deterrent for bugs. Not that it will be sitting on the shelf that long. If you prefer to use prepared stock in place of the bullion, it will be awesome! I use ultra gel because it is a sauce I can freeze well in casseroles. 

Chef Tess Basic Gravy Mix (gluten free)¼ cup Ultra gel
3T beef or chicken stock granules, MSG free low sodium
2T onion powder
2T garlic powder
1/2 tsp ground celery seed
1/2 tsp black pepper
1 tsp ground thyme
1 bay leaf
Mix Directions: Place all ingredients in a half pint seal able jar. Repeat as needed however many mixes you want to make. Please note, this mix makes 8 cups of gravy.
To prepare:
Whisk mix with 2 cups milk or water (broth or stock if you omit the bullion), when smooth add 6 more cups of milk, water or stock. Simmer over medium heat stir occasionally 10-15 minutes.

Individual smaller gravy:
1T ultra gel
2 tsp bullion (MSG free)
1T onion powder
1/8 tsp ground celery seed
1/4 tsp ground thyme
1/8 tsp ground black pepper
1 bay leaf
To prepare small batches:
Whisk mix with 2 cups stock or milk in a medium sauce pan with a heavy bottom. Simmer over medium heat 5 minutes.

Get the printable pdf version of this recipe here.

Tuesday, April 26, 2011

Chef Tess' Taco Soup Mix using NEW Instant Beans! And Product Review!

 We got something new in the store! Ooo-Laaa-Laaa!  Super cool INSTANT beans. What's the difference? Well...Our THRIVE Instant Red Beans will help you spend less time in the kitchen. Boiling dried beans can sometimes take hours, but with THRIVE Instant Beans you can prepare great meals in no time at all. Whether you use our instant beans for homemade refried beans, Boston Baked Beans, or bean soup, you will know that you are using a quality, long-lasting product that is an excellent source of protein and fiber. That's a mouth-full huh?! In a nut shell... They taste like regular red beans but they cook up super quick! I'm totally in love with them...for a bean anyway. So here's a Chef Tess moment of glory...a dancing in the hallway-jumping for joy-food-storage-moment of glory...ready?


You want to know the other cool thing? It just got a whole lot easier to make soup mixes for food storage! In fact when I saw the instant beans I almost started squealing. I know you're thinking, "Geeeek alert!" Oh my gosh!!


 I think I may be one of the only people on earth who gets this excited about food storage technology. Well...Troy does too.  However, that being said, I had to share this great new recipe I've developed from an old favorite. It's adapted using instant beans. Instead of taking hours to cook in a crock pot, it takes just about 20 minutes! I'm super excited about it! Can you tell?! It can fit conveniently in a quart size jar so it's perfect for food storage!


Put a funnel on the mouth of a quart jar and measure as follows into the jar:


 2 cups THRIVE instant Red Beans
1 cup Taco TVP
1/2 cup Dehydrated Onion  
1/3 cup Freeze Dried Mixed Peppers  
3/4 cup Freeze Dried Corn  
1/2 cup Tomato Powder  
1T homemade taco seasoning


                    So, here's  a picture of my new boyfriend red bean. I love him them.


When you get to the tomato powder, just shake the jar so it works its way into the cracks.

Add an oxygen packet. Seal. Good on the shelf in a cool place up to 5-7 years.  To prepare, place contents of jar in a gallon pot in a solar oven or on the stove. Add 2 quarts of water and simmer 20-30 minutes until veggies are tender. Serve with nacho chips, sour cream and salsa if desired.

Wednesday, March 23, 2011

Homemade Instant Pudding Mix


 Today I wanted to share a little information about using modified food starch for mix making. Thanks once again to Troy and Tracey at Preparing Wisely for sharing this cool stuff with me. This is called Ultra Gel. It gets thick in hot or cold liquid so it works amazingly well in instant pudding mix. I love that I don't have to cook the pudding, even though I could if I wanted to do so. Sometimes I love getting that cooked pudding skin...but most of the time when I'm making pudding I want it fast. My Father in law Mr. Putt-Putt is eighty something...and he loves his pudding cups. This saves us money. Fair enough right?

It can be used to replace the starch in any of the mixes I have on my blog including:
Cream Soup Mix at a fraction of the cost
Homemade cream of condensed soup replacement
Gravy Mix made easy

Nutritionally it's pretty low calorie and carbohydrate.
It's gluten free but not corn free. It can also be used in sugar free jam. Really!

It holds well and, unlike regular corn starch, it keeps it's thickening power after freezing.

For instant pudding I wanted something with about four ingredients, instead of the list found on a box of store purchased stuff. I try to stay as natural as possible. You know how I roll right? Well this is what we have come up with.
Instant pudding mix:
1/2 cup sugar or sugar free "spoon-able" alternative
1/3 cup ultra gel Ultra Gel
1/8 tsp salt
1/8 tsp LorAnn flavored oil of your choice (*butterscotch, vanilla, butter cream...you name it.)

I happen to use vanilla infused sugar on a regular basis for this. I keep vanilla beans in quart jars full of sugar. After about 3 weeks, the sugar has a very nice vanilla flavor. Yes...that is a vanilla bean sticking out of the top of the sugar...not a worm. Zoinks. That would be nasty.
To make into pudding:
2 cups cold milk or soy milk

Whisk the pudding mix into the milk and chill 10 minutes. Serve cold.

It will be about this thick at first. The longer it sits the better the set.


Other flavors:
*Pistachio pudding, add 1/4 cup fine chopped pistachio and 1/8 tsp pistachio flavor
* chocolate pudding, add 1/4 cup cocoa to the mix
*caramel pudding, use brown sugar instead of white sugar
*coconut cream pudding, use coconut milk instead of milk
*lemon pudding, use 1/2 tsp lemon zest and juice of 1/2 a lemon in finished product.
There you go.

Monday, March 21, 2011

Black Quinoa 101--how to cook it and where to use it.

I want to share something amazing, as I know that a lot of people have "toppers". That's a sauce with veggies or whatever...over rice.    It is one thing to have the freezer meal rice topper on rice, but another world to have it on a whole grain like quinoa or barley. I'm a huge fan of the Solar Cooked Fire and Rain Barley Pilaf as a base for soup or as a meal on it's own if we're talking grain. I have a long way to go adding a ton more on the subject of whole grain here on the blog. I hope you don't get sick of the new options. Variety is good. Even with grain, as it will nourish your body different ways and add another level of appreciation for good food. More than likely, my kids will at least be able to visit other families around the world someday and not freak out if they are served a meal they don't recognize. That's always good for foreign relations. So is this. Bolivia...I love you. I love your Black Organic Quinoa . Quinoa ( pronounced "keen-wah") is heaven. It has been cultivated in the Andes for more than 5000 years! Locally referred to as the "mother grain", it kept the Incan armies strong and robust. It's a protein powerhouse and considered one of the best sources of protein and amino acids by the United Nations. It's gluten free. Plus... look at it. It's just gorgeous and looks like Fall. Doesn't it? I fell in love the first grain that I ate. It is slightly nutty flavored and mild with amazing texture. Uncooked it looks like this...

The main thing to remember with quinoa cookery is to always rinse the grain. Always. It isn't optional like rice rinsing is. Quinoa will be huge wads of bitter unhappy junk in your mouth if you don't rinse it. I'm just saying...you've been warned. Put the grain in a strainer that is fine enough that the grain won't wash out.


This is how you cook it:


It will look like it has sprouted when cooked. It isn't sprouted. Just cool.

Because herbs freeze beautifully, I add a few from the garden.
This batch ended up like a fusion of Provence France and the Andes mountains. If that's possible--I'm eating brie with it. I'm using herbs that are traditionally combined for a classic French meal. Dill, parsley, tarragon, rosemary, thyme, basil and oregano. This with a subtle hint of lavender petals and some fresh squeezed lemon juice. Salt and pepper to taste.
Personal taste will vary and your preference for herbs may be different. As a general rule, I use about 1/4 cup chopped herbs to 2 cups cooked grain.
Put 2 cup portions in pint size freezer bags or containers and remove as much air as possible. Freeze laying flat for maximum freezer space.
Defrost in the fridge or in the microwave out of the bag. Heat 2-3 minutes microwave or add to your favorite soup or casserole in place of rice.

There you go. Explore a new grain this week.

Wednesday, March 2, 2011

How to Make Delicious homemade instant oatmeal packets (Gluten Free Oats Available)


Sugar and spice and everything...amazing! You won't, however, find these flavors in the pre-made packets from the store. Greetings from Chef Tess. Troy and Tracey have asked me to contribute to their blog here at Preparing Wisely and I am so excited to be part of what they have here.  


I try to do a post once a week on how to cook with food storage and or whole grain, and turn those foods into convenient foods we can use everyday. My husband Ace has been on an instant oatmeal kick for the last few weeks. My dear sister in law gave us a variety pack of 50 from a local Costco and ironically, we blew threw it in about a week and a half. Ace would eat 3 at a time. In an effort to not have all that extra stuff in the packets and to save money, I wanted to make some at home. These homemade packets we do are about double the size of the packets from the store...since that's about the portion Ace needs. Using the rolled oats, quick oats, sugar or powdered honey, and freeze dried fruits we had on hand, we made 20 double sized packets in about 20 minutes. The kids like to make the packets almost as much as they like to eat the contents! You can make the regular sized ones by simply cutting the recipes in half per packet. I use the regular zip sandwich bags for our double size packets. Snack size bags would work wonderfully for the regular single serving packets. Or...if you don't want to use baggies...you can use whatever recycle-style containment system you want. I'm not checking any cupboards.


This is a spiced peaches and cream cobbler oatmeal mix...homemade. Doesn't it look awesome? Well...the taste is exactly like a warm peach cobbler.


I start by making 3 different varieties of flavored sugars since I do a variety of oatmeal flavors. I used vanilla bean paste, but you can also use any of the flavored oils or bakers emulsions. I prefer LorAnn. That being said, the flavor concentrates will work, but you will need to use more...and let the sugar dry completely before making your oatmeal packets.
For Spiced-Vanilla Sugar you will need:
1 1/2 cup sugar, 2 tsp vanilla bean paste, and 1 T Chef Tess Wise Woman of the East Spice Blend, and 1/2 tsp dry lemon or orange zest.
Combine the vanilla bean paste with the sugar until well incorporated. Add the spices.
The second sugar I make is the base for my fruit and cream oatmeal mixes. I call it Bavarian Cream Sugar. You will need:
1 1/2 cup sugar, 1 tsp princess cake and cookie emulsion, and 1/2 tsp Bavarian cream flavored LorAnn oil.
Combine the flavoring well with the sugar.

The last sugar I make or use is maple sugar. It can either be real maple sugar (available at most maple syrup retailers) or you can make the fake stuff using this...
Use 1 cup sugar, 1/2 tsp maple flavor and 1/2 tsp butter-vanilla baker's emulsion.
Once I had all three sugars made, I allowed them to dry completely for 2-3 hours. Then I made sure they were nice and spoonable for the packets.
Again, I make the larger packets because I have men around here who refer to the paper packets as "shot glass" portions of oatmeal. These make the equivalent of TWO regular instant packets. If you want to make the smaller portions, simple cut divide in half portions, and use half as much fruit, flavors, and liquid to prepare the oatmeal.

To make one plain packet you need:

2/3 cup organic quick oats
2T of oat bran or rolled oats run through a dry meat grinder

To prepare: Add 1 Cup boiling water and allow to sit for 3 minutes. Use more or less water depending on how thick or thin you like you oatmeal. The secret to super thick oatmeal...using the meat grinder "treated" oats.

Oh...and a pinch of salt. I use Redmond Real Salt. It's my favorite.

I usually make about 20 packets of plain oatmeal and then add my different flavor varieties to make it more interesting in the mornings. We keep a large variety of freeze dried fruit on hand in our pantry. It's very convenient...and crazy awesome in oatmeal. I love it a lot more than dehydrated fruit because it is 100% free of moisture, so the packets don't get lumpy and odd. The only thing that should be lumpy and odd...is an old lady's patootie. Did I just type that out loud? Okay...so here's a few of the freeze dried fruits I keep around from Preparing Wisely:
Berries and Bavarian-lemon cream oatmeal packets:
add 3T freeze dried berries (I crush them up a bit before I measure them) to a packet along with 2T of the Bavarian Cream sugar and 1T Sour Cream Powder" , and 1/2 tsp dry lemon zest

Don't let the sound of the sour cream freak you out. It's amazing! Now if you don't want to use the powdered sour cream you can use non-dairy coffee creamer (any flavor). It works too...but it's not nearly as natural. Auntie Em used to use flavored instant pudding powder. Just remember that it won't be as sweet as the flavored sugar so you may need to add a little more sweetness.
To prepare the berries and cream oatmeal, add 1 1/3 cup boiling water and allow to sit for 3 minutes.
One of my all time favorite oatmeal packet flavors is my Spiced Peaches and Cream Cobbler. It reminds me so much of those Sunday night peach cobblers my mom would make when I was a kid.
To each plain packet you will need to add:
1/3 cup freeze dried peaches (diced rather than the sliced ones)
2T Bavarian Cream Sugar
2 tsp spiced vanilla sugar
1T Sour Cream Powder"
Just to tease you a little...this is what it looks like before you add the boiling water. I add 1 1/2 cups boiling water and let it sit for 3 minutes.

Maple Pecan Oatmeal Packet:
One plain packet
3T maple sugar
3T chopped toasted pecans


Add 1 cup boiling water and allow to sit 3 minutes.


Cinnamon vanilla-orange roll Oatmeal Packet:

One plain packet

2T spiced vanilla sugar

1 tsp dry orange zest (or 1/4 tsp dry orange crystal light)

Add 1 Cup boiling water and allow to sit 3 minutes
There you go. Make some oatmeal packets.

For those on gluten free diets...We 
carry gluten free Bob's Red Mill Oatmeal! This is purity tested for absolute gluten free integrity.