Friday, July 1, 2011

Chocolate Amaranth Bread!

And off we go! Welcome to Amaranth class. I'm chef Stephanie Petersen and I will be eating chocolate until I'm dead and bloated hosting this grand Grain Surgery 101 adventure!  

Amaranth is a supergrain! It's a complete protein. It's in the same family as millet. You all know how I love millet right? Amaranth (below, left) is a very small grain. Teff (below right) is the smallest of all the grains. Amaranth is right there though...very small. 
Added to baked goods when popped, it adds a light texture and nut-like flavor. I'm completely in love with it. Smooches Amaranth.
 I love how it looks in bread. I love how it tastes in bread. I love how it sounds like I'm doing drugs when my kids tell my neighbors, "Mom's poppin' Amaranth again."
For this amazing bread you will need this crazy cool recipe I Adapted from my chocolate bread recipe:


Whole Grain Chocolate Honey Amaranth Bread


12 oz luke warm water (no hotter than 110 degrees) 1 1/2 cups
1T  active dry yeast (or 1 packet)
1/2 cup honey
1/4 cup organic amaranth, popped to equal 1 cup (directions to follow)
1 lb 12 oz whole Kamut flour or whole wheat bread flour ( 5 1/2 cups)
4 (1 oz each) unsweetened bakers chocolate squares (or 3/4 cup cocoa)
1 T espresso powder (or Pero for the Mormon ladies)
2 tsp salt
4 oz olive oil, (1/2 cup butter is pictured but I usually use olive oil)
2 large eggs (1/2 cup)
1 T double strength vanilla
8 oz, high quality chocolate chips


Combine the olive oil OR butter and bakers unsweetened chocolate and melt slowly over a double boiler or in the microwave 15 seconds at a time. Stir often as to not burn the chocolate.
Stir and stir. Try not to imagine yourself as a one inch version of yourself floating away in a chocolate jacuzzi with Edward Cullen...he is fictional character. He will never love you.
In a large bowl, combine the yeast, warm water, honey and about 1 cup of the flour. When the chocolate mixture is completely melted, allow to cool so that it doesn't feel warm to the touch.
Now get out your amaranth.


Pop the Amaranth by heating a large deep pan 2-3 minutes on high heat. Add the 1/4 cup amaranth and stir with a wooden spoon until it pops.
 It will become bright white and take on a nutty flavor. Yah...no comments on my lack of a tan...and my crazy-brain either.
 Isn't it the cutest little mini-pop you ever saw? If I was a Smurf, I'd take this to the movies. In the bread, it gives a nut-like flavor without adding fat and most definitely adding a ton of nutritional goodness!

 Mix the amaranth  into the water flour and yeast mixture. Add the salt, vanilla, eggs and remaining flour, reserving about 1/2 cup of flour. Knead by hand 5-7 minutes until a soft supple dough is formed. It should look like this.

Very little if any flour is needed to keep this dough from sticking to the work surface if you have followed the recipe correctly. Place in a 2 gallon covered bowl and allow to raise about 2 hours, until doubled in size.
Punch down dough.

 Divide the dough in half.
Roll out into a 14 inch by 10 inch rectangle and spread half the chocolate chips onto the dough, leaving an inch around the outside edge. It helps to lightly roll a rolling pin over the chocolate chips to ease them into the dough. Be careful not to push them through, just nestle them in the dough...
Tightly roll the dough into a long log, encasing the chocolate chips. Don't make them longer than your sheet pans. I don't have a huge oven like I did in the bakery...so I had to make them short baguettes...like 16 inches or so.
I had a dream about an alien planet that was all cratered with chocolate chips like this. I think it was after I had eaten too many brownies.

When it is all rolled, be sure not to let any of those little cuties escape. Hey...an escaped nibblet. Ooop. I had to do a mercy eating...just so it wouldn't get burned in the oven. See how benevolent I am.
Place loaves seam side down on a lightly oiled sheet pan or pan lined with parchment paper. You can cover each loaf lightly with plastic wrap or place in an Unheated oven, lightly spraying it with a mist of water. Raise 1 1/2-2 hours, until very fluffy. Remove wrapping or take out of cool oven. Preheat oven to 375 degrees. Take one egg white and 2T water and whisk together in a bowl. Lightly coat the top of the bread with the egg mixture using a pastry brush.
Slash with a sharp knife lightly three times across the top of the bread.
Bake 40-45 minutes or until over 170 degrees with a meat thermometer.


When baked, the outside will be smooth and shiny. The inside will be studded with chocolate chips. Well, unless a few peek out through the slash marks. On a side note...I also like to make little buns with this dough and just put a square of chocolate in the middle of the dough, much like I do for the caramel stuffed sticky buns
There you go.


Don't lick the computer screen. It's not Edward Cullen and it will never love you. Stop poppin' too many amaranth...you freak.


Make your own. There you go. {Evil grin} Don't you want to just try amaranth now?! Come on down. We have it at Preparing Wisely!

Thursday, June 23, 2011

Gingered Mango Coconut Crumb-cupcakes with White Chocolate


 Who knew that  Freeze Dried Mangos and 

6 Grain Pancake Mix  could make amazing cupcakes?

Well...I'm here to say that we've had some great success with using the pancake mix for more than just pancakes!  

Here's my recipe:

Gingered Mango Crumb Cakes drizzled with White Chocolate

2 1/2 cup THRIVE 6 grain pancake mix
2 cup Honeyville Freeze Dried Mango (hydrate with 1 cup hot water for 10 minutes)
3/4 cup sugar
4 large eggs (or dehydrated Powdered Egg Whites, hydrated to equal 1 cup of liquid)
2 tsp  pure vanilla
1/2 tsp rum or brandy flavor
1 T ground ginger
1 tsp ground cinnamon

Crumb topping:
2 1/3 cup THRIVE 6 grain pancake mix
1/2 cup coconut oil
2/3 cup sugar
1 tsp ginger
1/2 tsp ground cardamom


Directions: Preheat oven or solar oven to 325 degrees. Lightly oil muffin pans and line with cupcake papers. (Yields 24). In a large bowl, combine the hydrated fruit, oil, sugar, egg, vanilla and flavor. Whisk until well combined.  In a separate bowl combine pancake mix, oats, ginger and cinnamon.  Combine the wet and dry ingredients and mix by hand 100 strokes.  Scoop into cupcake cups, filling half full.  Top with crumb topping. To make crumb topping, combine ingredients for crumb topping until it looks like this:
Top cupcakes. Bake 15-18 minutes until a toothpick inserted in the center comes out clear. I drizzle with 8 oz of melted white chocolate when cooled. 


Chopped toasted macadamia nuts sprinkled on top of the chocolate might make me pass out...


There you go! Another way to use your pancake mix! Enjoy! 

Wednesday, June 22, 2011

Buckwheat and Teff Gluten Free Blender Pancakes


I had a request for a whole grain blender pancake that is gluten free. As always, I am happy to help, as I have many friend who deal with the whole "gluten free" issue. So, I thought I'd share that buckwheat is in fact 100% gluten free! It's awesome for pancakes and a powerhouse of nutrition. It's well worth using for pancakes.  So far, I love the soak overnight method best, even though it does actually work to just put the buckwheat in the blender unsoaked. I prefer to soak, as I know that this will aid the body in digestion of the grain.  
Here's my recipe:
1 cup buckwheat (soaked overnight in 3 cups water and drained)
1/2 cup Teff (if you don't know about this whole Super-grain...it's amazing!)
1/2 cup egg whites (this makes a fluffy amazing pancake Powdered Egg Whites can be used, hydrated )
20 drops stevia (see below)
1 tsp lemon or orange zest
1/4 tsp salt

In a blender, all the ingredients.

I LOVE the stevia we carry in the store. It's got a really clean flavor. The advantage of using this, opposed to using sugar is that it won't stick to your griddle...and it won't make you fat. Okay...it's a 100% natural sweetener that doesn't cook out on the griddle so it makes a supremely lightly sweet breakfast pancakes.

Blend on high for 3 full minutes, adding more water as needed to make a smooth batter. I didn't have to use any.
Cook on a lightly oiled hot griddle 2 minutes on each side until cooked through.
Yeah! You'll need some Maple Syrup!
There you go my gluten free friends! Buckwheat-Teff pancakes! Enjoy!

Tuesday, June 21, 2011

Wild Rice is Here!


We got wild rice in the store this week and all I can say is Hooraaaaaay! I was so excited the second I saw the box that I took pictures right away and posted them on our Facebook Page. Yes...I'm a bit of a grain geek, but that's what we like right? Walking geeks of grain? We get our rice from a company called Fall River Wild Rice. If you want to learn more about their rice, you can read about it here.
 The broken variety we got in is a lot less expensive than the full long grain version, but it's flavor is still awesome and just what you would expect in a wild rice. Use up to one cup of the cooked rice in your bread dough for a wonderful contrast of flavor and color. Mill the wild rice in your grain mill for a fine, gluten free flour to add to cookies, cakes and pastries. It will lighten up the final baked good considerably.

Cooking Instructions

Cooking Wild Rice Using the Stovetop Method

Wash 1 cup uncooked wild rice thoroughly. Add to 3 cups boiling water, salted to taste, in a heavy saucepan. Return water to boil and stir. Reduce heat and simmer, covered, 50-60 minutes or just until kernals puff open. Uncover and fluff with table fork. Simmer five additional minutes. Drain any excess liquid. For chewier texture cook less time. Yield: 3-4 cups of cooked wild rice. (For additional flavor, try cooking in beef or chicken broth)

Cooking Wild Rice Using the Oven Method

Wash 1 cup uncooked wild rice thoroughly. Combine with 2 cups water in a covered 2-quart casserole. Cover and bake at 350 F for 1 hour. Check wild rice. Ad more water, if needed, and fluff with a fork. Continue baking for 1/2 hour. wild rice should be moist, not dry. Yield: 3-4 cups cooked wild rice. (For additional flavor, try cooking in beef or chicken broth)

Cooking Wild Rice Using the Microwave Method

Wash 1 cup uncooked wild rice thoroughly. Combine with 3 cups water in a covered 2-quart glass casserole. Microwave on HIGH for 5 minutes. Microwave on MEDIUM (50 percent power) for 30 minutes. Let stand 10-15 minutes, drain. Yield: 3-4 cups cooked wild rice. (For additional flavor, try cooking in beef or chicken broth)


Fall River Wild Rice Nutritional Information from their website:
Wild rice is highly nutritious.   In fact, thanks to the optimal conditions under which it is grown, Mother Nature has blessed this unusual grain with amazing qualities.  Containing more than 12% protein uncooked, wild rice is significantly more rich in protein than common white rice or most other grains.  It is high in complex carbohydrates and is a good source of fiber.  In contrast, its sodium content is refreshingly low.  Wild rice also offers exquisite flavor.  No wonder it has created such a stir among today's health-conscious consumers!  Wild rice is an important component of a balanced diet.

U.S. Wild Rice Nutrients:
Based on 1/2 cup cooked wild rice Amount per Serving:
 Calories320
Calories from fat10
Total Fat 1g2%
Saturated Fat 0g 0%
Trans Fat 0g0%
 
 Cholesterol 0mg0%
Sodium 10mg0%
Total Carbohydrate 68g23%
Sugars 1g0%
Dietary Fiber 6g24%
Protein10g
 
Vitamin A0%
Vitamin C
0%
Calcium
2%
Iron
10%
* Percent Daily Values are based on a 2,000 calorie diet.


We have it for 5$ a lb, in a 5 lb box. If they sell fast enough, we will order more and keep them in stock.

Friday, June 17, 2011

Grain Surgery-- Basic Grain Identification 101


After last nights bread class at Preparing Wisely, I realized it would be a good idea to start posting a lot more Grain education.  It's an amazing area to expand your culinary know-how.  


Are you befuddled? Many would look at this collection of grains and wonder what the heck-fire they all are and what to do with them! Well, never you worry! Chef Tess will help you get a grasp of basic grain surgery! If you missed some of my most basic recipes for grain along with many tutorials, look here . We'll be doing a lot with whole grain...a lot more than you've seen! I'm also going to be referring you to my friend Chef Brad Petersen, since I'll be working with him and his whole grain flour line a lot more (Details to follow...)


I'm starting today with just showing what the grains look like and then we'll cover how to cook with them more in depth. I hope everyone is okay with learning this step by step. I think it's a good way to go.


 Let's start at the very beginning...a very good place to start.  Oh have mercy. Try not to imagine me in the Sound of Music with a gaggle of kids in front of me wanting to listen to me strum my guitar. Instead...think of the smallest grains of sheer AwEsOmeNeSS...and you will have these two buddies.  Auntie Amaranth and her friend Teff.


This is Amaranth. It's one of the smallest grains out there. Amaranth! Pop it and you're addicted...like crack..but healthy. See, I say popping amaranth and it sounds like a new drug huh?  Well, if so...it looks like this.
 Yet smaller is Teff. Teff came to us from Ethiopia where there are several thousand wild varieties. We only have two colors so far...but it's awesome stuff. 
It also takes 150 grains of Teff to equal on grain of wheat...so it's smaller than heck! Heck is small...


Pearled Barley is the most common way to find barley. My favorite recipes for barley are  found here: whole grain barley.


 Hulled Buckwheat and Unhulled buckwheat (dark below) Buckwheat is actually not related to wheat at all and is 100% gluten free.


 Brown Jasmine Rice.


 Now, if you saw all these grains in a stack, could you tell by looking, what the names of the grain are?


Kamut   Khorasan wheat is 1/3 longer than regular wheat and high protein. Excellent for making pasta and bread because of that protein! Plus, look how it is almost gel-like in it's appearance! noodle mix is a great place to start.

 Look how long Kamut grains look next to soft white wheat!

Oats look a lot like wheat, but are long and thin, almost like a grain of rice.  Oat groats like below, are unrolled. There are many people who have never seen a piece of oat that isn't a rolled oats.


 Soft White Wheat is recognizable in two ways, it's got a short grain and it's not gelatinous in appearance.


 How is that Spelt ?  Many people with an allergy or intolerance to common wheat can tolerate spelt even though it is an ancient form of wheat. Why? It hasn't been genetically altered as many of our modern wheat has.


This is classic Hard Red Wheat. It's most famous here on the blog in the Sprouted Wheat bread tutorial and the sprouted wheat tortillas. 


whole grain quinoa. Pronounced Keen-wah... Quinoa comes in Black, Red and White. How to Cook it! 


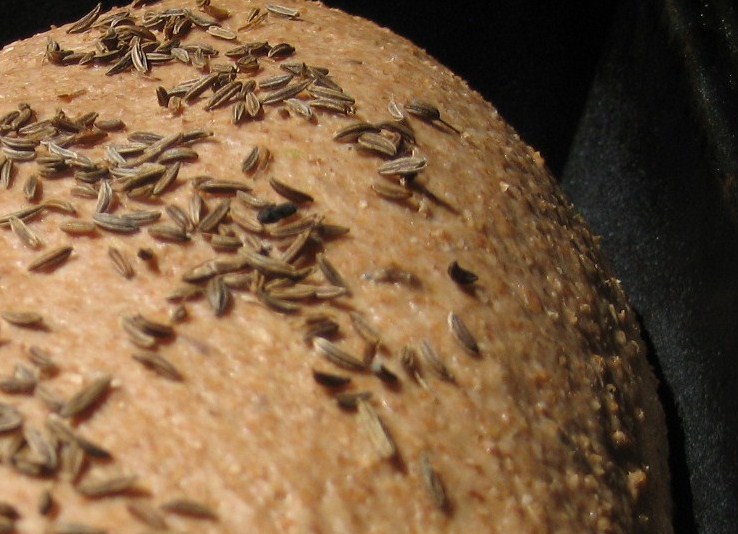
Flax Seed


Popcorn


Rye

 Classic Rye bread


Black and White Chia seeds! See the scoop on this super grain :whole grain chia 


Corn AKA field corn...corn nuts are a great place to start but you can also lean how to make masa in the homemade corn tortilla tutorial, masa is also amazing for  tamales!


Millet is yet another amazing grain. Check out how to use it the section: whole grain millet

sorghum 

For more powerful grain education, visit my friend Chef Brad! The last time we spoke, he asked me if I would be willing to try out some of his new flour line and share them with you folks here on the blog! Now isn't that nice?! Even nicer, his new TV show! is on the BYU channel. Word is he gets to do 32 more episodes...and asked me if I would be a guest chef upcoming! WOW! Now, we are both chef Petersen, but don't be confused...he's way more famous for grain. He told me he's also coming out with a package of grain samples so people  will always be able to get smaller samples of the grains before purchasing them in bulk. I think he should call them "Home Grain-Surgery kits." I don't think he will though. I for one, will always be the whole grain  Bread and Rolls gal...with ya know, all the other insane things I do. Thank you Chef Brad! I'm looking forward to that flour...and the show!

Get your grain surgery education finished so we can do some serious damage. Seriously!
Now, imagine what you can do when you know how to use the healthy grains and also have learned all the 
Culinary Herb and Spice use and remedies from my blog here! Won't that be a powerful day?!

There you go.