Wednesday, April 20, 2011

Culinary Herb and Spice Remedies 101 (The Alchemy behind the flavors)


Last week I taught an herb and spice alchemy class at Preparing Wisely in Mesa, Arizona and promised to share a few of the things I would be teaching my students during the class here on the blog for the people around the world who obviously couldn't attend.  It was pretty comprehensive and full of great recipes on matching spices and herbs to complement ethnic flavors. If you want to read more about those recipes go here. The other side of the class was the whole medicinal use of culinary herbs in food.  Troy has ordered many organic spices into the store and they are very reasonably priced. I hope you will stop on by and add them to your food storage necessities!

I think a lot of times this "herb and spice" side of eating is completely  misunderstood as just perhaps a "flavoring".  Adding herbs and spices traditionally was not only for flavor, but also for health.  I hope today I can share some of the bare basic homeopathic uses for some of the most common culinary spices and herbs. These are probably remedies your great grandmother used long before there were modern medicines. None of these statements have been reviewed by the FDA. FYI. That's not saying that they don't work, it's just saying they are not tested yet.

  For general information, I store my spices whole and grind them fresh so I don't lose any of the essential oils or nutritional value of the spices. I keep them in a cool dark place in non-porous glass containers. I also grow my own herbs organically in my garden.  The pictures you see, are all my own.  Seriously, these are the short descriptions. This is also a short list. There are many herb and spices not listed.  There are long books on this subject so I'm just scratching the surface here.  Shall we begin then? We'll start with Spices, the seeds and barks of edible aromatic plants. Then we'll move on to the herbs (leaves, stems and flowers).
Spices 
 Allspice. It is a sweet spice generally used in cakes, cookies and desserts.
 The natural oil is used topically as a pain reliever and the powder is an antioxidant with what is believed to be antic-cancer action.
 Cardamom seed— A sweet  spice with lemon notes.  I use it often when I mill my flour. It adds a light fresh taste to pastry and cakes. It is also used in many Indian dishes.  Medicinally  it is favored as a carminative  to ease digestive gas, cramping and flatulence.
Clove--Sweet Spice  used in desserts and in some sauces. Medicinally— essential oil used as an aromatic and pain suppressant (I used it sparingly on teething baby and it worked) , antiseptic, powder to alleviate vomiting (antispasmodic)
 Nutmeg--Sweet spice used in cakes, pastries, and some sauces. Medicinally used as an —antispasmodic, anti-inflammatory, digestive aid, gastric stimulant, prevent vomiting, and help boost appetite.
 Cinnamon--Sweet Spice used in desserts, cakes, pastries and teas. Medicinally used as a digestive aid , antiseptic, uterine stimulant (cramps), help regulate blood sugar levels in diabetics.
 Dill Seed---from the dill weed plant Weee! This actually happened in my garden folks. I loved seeing the dill go to seed. Licorice notes used in pickles, sauces and many ethnic dishes. Medicinally the seeds are used mashed and then infused for stomach ills, colic, diarrhea, anti-bacteria, and a carminative. I actually used mashed dill seed infused in a tea  and then strained and cooled for my colic babies and it helped immensely.
Fennel seed used in sweet cakes  and savory applications like fennel sausage with a  pronounced licorice note.  Medicinally it is used for colic,as a digestive aid, to normalize appetite, as a liver cleanser,  to reduce uric acid and to soothes gout.
 Coriander Seed used ground in Spanish, Indian  and Oriental cooking with heavy lemon notes. It is the seed that produced the fresh herb cilantro!—Medicinally it is used for it's properties as an antioxidant, anti-inflammatory, anti-bacterial, digestive aid, colic, joint pain reliever.
 This is my cilantro that went to seed. Yes folks. I did grow my own coriander this year too! How cool is that?

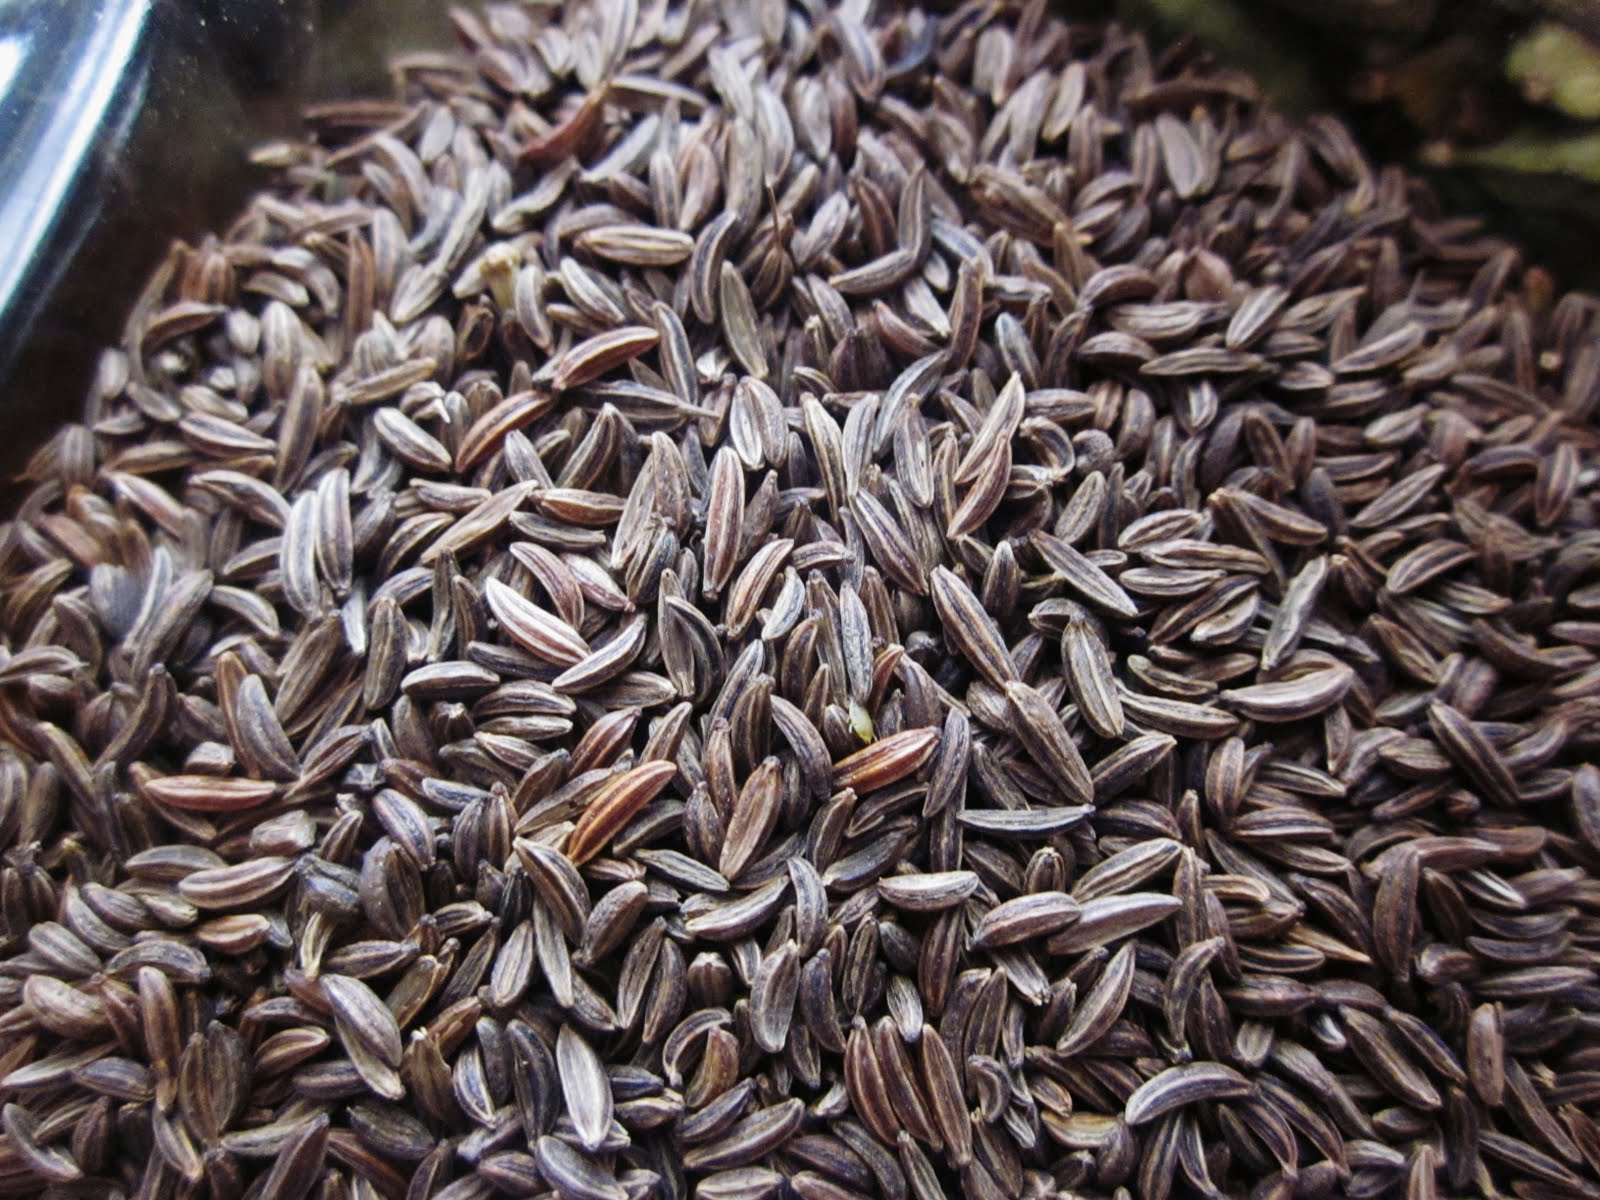
 Caraway seed gives rye bread it's distinct flavor and is also often used in sauerkraut. Medicinally it is a stimulating expectorant for congestion, antispasmodic, digestive stimulant, and the oil is an antiseptic.
 Black Pepper is used ground  in savory dishes and breads.  Medicinally it's used for coughs, heartburn and indigestion, toothache and canker sores.
 Cumin seeds  used ground. When you smell it you'll think, "Mexican food". Medicinally they are good carminatives which help to relieve abdominal distension. It helps to digest food and improve peristalsis. Another use which is very rarely known is that it helps to minimize the abdominal pain during menstrual periods when consumed for 2 weeks prior to the date of menstruation. It is good to consume with warm water. Read more: here

 Herbs

Tarragon is used in sauces and breads most often in French cooking. I think it's one of the Kings of herbs. I can't list all it's medical uses but it's often used as a diuretic, antidepressant, to promote appetite, fight fatigue, calm nerves, and has been used to aid sleep as a mild sedative. Read more about it here.
Rosemary is used in sauces, soups and teas. Most often in Italian and Greek cooking but also French. It couples great with chicken and is often one of the first ingredients in poultry seasoning (or chicken soup). It is used medicinally antispasmodic, relaxant, stimulant to circulation and nerves, cardiac tonic.
 Thyme used in sauces, soups and poultry. Medicinally it's used as a uterine stimulant, antiseptic, expectorant, diuretic, antibiotic, astringent
Dill used for salads and in Greek and French cooking. It also makes the most amazing  Cottage Dill Bread. Medicinally it's used  for stomach ills, colic, diarrhea, anti-bacteria, and a carminative.

Oregano used in sauces, soups and salads most often in Italian, French, and Mexican dishes. 
Medicinally:
To soothe colic, make a tea, leave to cool, then strain the herb to leave a clear liquid. Feed the baby a little
at a time. Try the same preparation for to relieve coughs in adults. Additionally, prevent or relieve a heavy chest by eating lots of oregano at key times. Hay fever sufferers may find some relief by sprinkling the dried herb on salads, whilst eating oregano in winter dishes can help loosen phlegm during the long months of the common cold. I use Oil of Oregano in my olive oil for dressings and also as a supplement in gel caps.It is one of the strongest and most effective broad spectrum antibiotics known to man. It is natural and safe to use. It will not create more mutant strains of bacteria. It effectively kills bacteria of every variety using only tiny amounts. It is also effective against fungus, parasites and viruses. (More on that to come but I'm seriously happy that I found it.)


 Parsley  is used fresh to impart new life and flavor to dry herbs (add at the end of cooking just before serving). Fresh parsley is loaded with LIFE! Medicinally it is used for—Kidney and bladder problems, anticancer properties, antioxidants,  stimulate the nervous system, adrenals, and liver function. It's also good for killing bad breath...but that's just a side note.
Basil most famously used in pesto and Italian cooking but also used in French and Oriental cooking.
 Medicinally it is used as an antiseptic and antidepressant. It restores and calms.


Juniper Berries used in mulling spices, pickling spices and some savory spice blends.
 Probably most famous from my post on using Pine Cones for Dinner! ha! This is what they look like on the tree. When they dry they will be a deep almost black purple. Medicinally they help with a kidney cleanse, removing blood toxins, destroying fungi,  improving the optic nerves, brain function, easing colic
and  easing digestion.


 I did a great post on the Edible Flowers of the Sonora Desert. Edible flowers are also in the "herb" category and have to share my two favorites. I use them often as a hint of flavor but many don't realize that I am also using them relax and sooth my guests. I'm most famous for using my lavender and rose petal in my Wise Woman of the East Spice Blend to add sophistication and vintage charm to pastries and desserts. It's used anywhere one would use cinnamon. Seriously though...it's also a nerve tonic. It will make you happy. See...and you thought it just tasted good. BE sure you use FOOD GRADE flowers only. Many of the "craft store" branded flowers have been treated with chemicals that are harmful for human consumption.  If you don't grow your own I've been know to  get mine at Penzey' or a local health food store that carries herbs called The Good Apple.
 Lavender flowers used aromatically and also ground in desserts and some French cooking. I adore it in Tapioca. Medicinally it is used as a relaxant, antispasmodic, circulatory stimulant, diuretic, nerve tonic, uterine stimulant. 

Rose Petal  used in desserts, frostings and aromatherapy. Medicinally used as an antidepressant, calming sedative, digestive aid , aniti-inflamitory,  and anti-viral agent.

Like I said before, this isn't a complete list, not even by a long shot. I do hope however that it has given you some good ammunition when facing herbs and spices in the homeopathic world. It's really quite exciting to think that those amazing flavors can actually help heal and bless the lives of those you love. It's not just food...it's a whole healing art.

There you go.

Monday, April 18, 2011

Coconut Lime Millet Breakfast Pudding (Pressure Cooker 101)

Isn't 

Millet Divinity?

 It's Monday. Oh how we love Monday. It's like a blessed reminder that we have another week to live. It's a glorious new start. It's...gosh...another week of meals. Now, imagine me whirling around on the hills of Austria like Julie Andrews singing , "The MEALS are Alive! with the sound of Music!"Fa la la la !! " Doesn't that make you feel better (or slightly nauseated) ? Monday's also the day I try to share some great way to use food storage and expand just a little on the whole grain, if I haven't done that every other day of the week. Dear land. I think this breakfast will totally count as that. It's a gluten free, dairy free, cream-a-licious pudding that isn't too sweet. I'm a push over for lime and coconut anyway. Millet is a natural couple for it I might add. I also cook it in a pressure cooker, so it's fast!  I'm doing a little tutorial pressure cooker usage too, so if you're a little new to the pressure cooker, join the fun. It's a handy dandy tool to have in your kitchen.
 This is Chef Tess everyone. I have to share some fun that I've had with this  Presto Electric Pressure Cooker .  It's such a handy tool! Did I say that already?!  I love that it doesn't take stove space. I've used it often so I thought I'd show how to cook the millet pudding in a pressure cooker using this model. If you have another brand, you'll have to use your pressure cooker's instructions, but they are all pretty similar.
Chef Tess Creamy Coconut Lime Millet Breakfast Pudding
2/3 cup millet,
 13.5 oz can coconut milk, 
1 cup water, 
zest of one lime,
 pinch of salt
1/2 tsp vanilla
1/4 cup toasted coconut (optional)

 Place pressure cooker on a dry, level heat resistant surface in center of counter top. As s general rule, prepare ingredients according to the directions in the pressure cooking recipe you have selected. If larger quantity is desired, you may increase the ingredients by half. Be sure not to overfill the pressure cooker.  It's also very important to look through the vent pipe in the lid of the pressure cooker to be sure it is clear of any blockage. You don't want to find that out later when the heat is on.
 This little doo-hik-ee is called a "pressure regulator".  It goes on the top of the vent in the lid.
 Like this.
 On the handle and lid there are arrows that need to line up. Hold the body handle with your left hand and the cover handle with your right hand and twist using a slight downward pressure to get the lid to seal on. Wait. First put the pudding stuff in there.
 2/3 cup millet
 1 can coconut milk and 1 cup of water.
 pinch of salt
 add the  1/2 tsp Wise Woman of The East Spice Blend 
 and the 1/2 tsp vanilla

 Now align the arrows by placing one hand on the cover near the helper hand and applying a slight downward pressure. The pressure cooker is completely closed when the cover handle is directly above the body handle.
 This model shows it is locked.
 You will notice a little rubber knob on the top of the pressure cooker. It is an air vent.
 Turn up the heat to 400 degrees or high.
 The air vent will pop up and then...
The pressure regulator begins a rocking motion. Cooking time starts at this point. 12 minutes for this pudding. Allow the pressure regulator to rock vigorously for 1-2 minutes and then slowly turn the heat control down, stopping just at the point where the pilot light goes out. As cooking proceeds, the heat control will cycle on and off to maintain the proper cooking pressure. The pilot light will go on and off and pressure regulator will rock occasionally indicating that the pressure is being maintained. Note: If the pressure regulator does not rock every 2-3 minutes, it is likely that the heat control has been set too low. Turn the heat control up slightly until the the pilot light comes on.  
 To prevent excessive liquid loss, do not allow pressure regulator to rock vigorously for more than 3-4 minutes. If the regulator is allowed to continuously rock, excess steam will escape. This will cause too much liquid to escape and food to scorch.  Do not leave pressure cooker unattended.   After 12 minutes, turn off heat.
 Wait for pressure cooker to decompress naturally. This may take about 10 minutes.
 Remove pressure regulator only after air vent cover has returned to the flush position.
 The pudding is creamy and ready to be sweetened...
I use three droppers full of stevia.  Preparing Wisely carries this in the store but not online yet. It's by far my favorite brand of stevia since it doesn't have an a funny aftertaste like some of them do.  


Or you can use 1/3 cup or so of 
I like my coconut crispy. It's a nice crunch on top of the creamy pudding.  So I stir in the lime zest and sprinkle the coconut over the pudding.
 We serve it up warm.
There you go! Happy Moday!!

Friday, April 15, 2011

Highlights from the Spice Class

 I have to say, it was such a sweet highlight of my week to have the spice class at Preparing Wisely tonight! So many dear friends came to learn and share. Joy of joys to have my kindred-spirited sisters whom I've loved for so long join me once again! It made me smile. Well...smile more than usual. If that is possible.  There were also new faces. I'm so thankful for each one! Thank you all for being there.

So I thought I'd cover a little 101 for those who didn't make it or who are out of town. The first thing is...What is the difference between a spice and an herb?
 Herbs are the aromatic leaves, flowers and stems of plants. Fresh or dry work. Make sure you smell the jar. If it smells like the herb then the stuff inside is still full of flavor. If they smell like dust...then you are just going to be adding dust to your food. Eeewwww.  My darling friend Tina brought her spice rack and had quite a few jars that were very old and full of dust. So...we had an intervention party. I guess you had to be there, but the whole group was laughing at each new jar of dust as we cheered to see it emptied of the pointless "pretties" (like getting rid of a lame boyfriend who's good for nothing...) It was awesome! Very liberating and freeing.
Spices are seeds and bark. They will need to be ground. If you don't have a spice mill (not many do...then just buy the pre-ground and be sure it's fresh). For long term food storage, I purchase whole seeds and store them in non porous containers stored in colder temperatures (70 degrees or less) and preferably in the dark. 

We covered some of the basic homeopathic uses for culinary herbs. For the most part they ease digestion but there are quite a few very beneficial uses that are amazing!  That will have to be an entirely different post. There's a ton of information. 

The other thing we covered was basic herb combining and which flavors work together best for "ethnic" flavors. We made three identical pasta salads from the basic pasta salad recipe. Then we made three different salad dressings and had totally different and amazing salads! One Greek, one Mexican, and one Asian. This is where we didn't use a recipe. You read that right. No recipe. We're going to shut down our number crunching mind and start to trust our artistic ability. We're going to smell the jars! We're going to start to really get a feel for what's in the kitchen. It starts today. Mind you, I will give you some guidelines of herbs and spices that work together well...so you don't feel all together clueless.
Since we were in the store, we used all our freeze dried products instead of the fresh vegetables. You can't even tell the difference in a pasta salad.  We used Orzo pasta (it looks a lot like rice when cooked) but you can use cooked quinoa, barley, wheat or rice as the base instead. 

Basic Pasta Salad
1 lb pasta of your choice, cooked al dente and seasoned well with salt and pepper. (Lower carb? use of thin sliced cabbage will really improve that carb count.)
1 cup chopped bell pepper (1/2 cup dehyrated THRIVE mixed bell pepper hydrated with warm water 10 minutes)
1 cup carrots, shredded or chopped (1/2 cup freeze dried carrots, hydrated with 1/2 cup water)
1 stalk celery, sliced thin (1/2 cup freeze dried celery, hydrated with 1/2 cup water)
1/2 medium red onion, sliced thin or chopped fine (1/2 cup freeze dried onion, hydrated with 1/2 cup water)

Basic Vinaigrette (for pennies a jar...) (FAT free coming up in a few lines)
1/4 cup red wine vinegar or cider vinegar
1 tsp fresh pressed garlic
Herbs and spices
salt
pepper


Want fat free salad dressing? Did you know it's almost free to make if you have cornstarch and juice already in your cupboard? Use 3/4 cup vegetable broth or juice and 1/4 cup vinegar. In a cold sauce pan combine the vegetable broth with 1 T cornstarch. Add the liquid slowly and then when combined, cook on medium heat, boiling until thick, about 5-7 minutes. Allow to cool slightly and then add the vinegar and remaining herbs and spices. Use immediately. Keep refrigerated. If dressing gets thick simply add a little more vegetable broth to thin.

Flavors That Work Together Well
(Not a complete list of spices...just a guide) 

Italian:
Herbs: Basil, Rosemary, Thyme, flat leaf parsley, marjoram,
Spices: Fennel, caraway, crushed red pepper, celery seed.
Flavor Agents: hard cheeses like Parmesan, asiago. Olives, roasted peppers, citrus zest, capers.
Greek:
Herbs: Dill, Oregano, Rosemary, Mint, parsley,
Spices: Fennel, anise, black pepper, dill seed
Flavor agents: Feta cheese, olives, pickled peppers.
Asian:
Herbs: cilantro, mint, lemon grass, sesame oil (use 2 tsp in place of some of the oil)
Spices: Cumin, Chile paste, curry paste, fennel, ginger,
Flavor agents: lime zest, soy sauce, hoisin sauce, citrus zest, peanuts or cashews

Mexican:
Herbs: Cilantro, Oregano, thyme
spice: Cumin, coriander, Chile pods, black pepper, allspice
Flavor agents: lime zest, Roasted corn, green onions, radish, black olives.

Toss the herbs and spices in the dressing. The flavor agents can be added directly to the
basic pasta salad recipe. Mix and match fresh veggies as they are in season. Add fruit if
you like. For hearty dinners, add some roasted chicken or beef. Marinate meat in the
vinaigrette and save a lot of money on those fancy bottles of pre-made stuff. You can
do it. Start to feel yourself free up in the kitchen. It is very liberating. Enjoy.

Now for you folks who just want a grab and go dressing fix, you can just use the pre-made spice blends. You
know...fajita seasoning, Italian seasoning, Greek Seasoning... Don't hurt yourself if you don't feel able to do the artsy stuff yet. I'm patient... and it's a process. Feel the Love babe.  

Upcoming this next week will be herb and spice week! I will have highlights on specific herbs and spices, their homeopathic uses and what to do with them in your foodie food! It will be so fun! Plus...Troy has ordered into the store a lot of bulk organic spices at very very reasonable prices! So you can add these to your food storage without killing your budget. Come back again this upcoming week. It will be full of surprises!

Tuesday, April 12, 2011

Basic Boiled Beans (Some Staple Cookery 101 from Chef Tess)

 Happy Tuesday.  All of our Thrive food products are 15% off in the store this month so it seemed like a great idea to cover some of the staples and how to cook them. This one's for anyone who has ever wondered how to cook beans. So...lets talk about magical food. Beans. I teach basic cooking skills as well as advanced culinary arts. That's what I do. I'm a firm believer in the fact that if you may never know when you will be called upon to cook a staple food, or a fancy dish. Knowing the basics of something as simple as beans is something you will never regret. You may know how to make painted breads, but honestly, that isn't a daily need unless you run a bakery. You will always have to feed yourself or your family. Sometimes things may be financially tight, or you may be looking for a lean nutritional main dish. Food wise, you can't go wrong when it comes to beans. Their nutritional data can't be beat, especially fiber and calories when it comes to filling up hungry bellies and staying full! Beans are amazing food...unless of course, you don't cook them correctly. Then you have these crunchy bean shaped things in sauce...that frankly aren't very appealing. It reminds me too much of eating bugs. Yes, I also ate bugs as a kid. I know that explains a lot.
 As for beans, what you really want, is this...
Basic Bare Bones Boiled Beans
You will need:
1 lb of dry beans ( like Pinto Beans , black,Black Beans  white, black-eyed peas,Kidney Beans  ,Small Red Beans )
water
1T  Baking Soda  (optional)

Flavor Options I use:
pepper, bay leaf, Chef Tess All purpose Seasoning  , garlic, 1/2 cup Dehydrated Onion, 1/4 cup Freeze Dried Mixed Peppers, and Real Salt  
Step 1:
Wash and soak* beans. Rinse with hot water and make sure there aren't any rocks or foreign matter in with your beans. Let's face it, they come from plants...there might be dirt. Clean it up. I soak my beans in a gallon of water with 1T of baking soda. I have found this step most useful in helping to break down the acids in the bean skins. They cook softer. After 8-24 hours of soaking, I drain the water, rinse again and put in a crock pot or the pot for my Global Sun Oven.  *Note, you don't have to soak beans, but it does help shorten the cooking time, as well as help with digestion "issues"...if you know what I mean. I think you do. You can "quick soak" beans by pouring boiling water over the beans and soaking one hour.
Step 2:
Place drained beans in 4 quart crock pot or stove top 6 quart pot. Cover beans with 6-8 cups very hot water and simmer. No salt is best at this point. No tomato products either. Salt added at this point will make it take longer for the beans to cook. Acid products like tomatoes will make it hard to cook period. To be sure, use just the water and the beans. If you use chicken stock to cook beans it adds flavor, just be sure it's low sodium. Okay...I say that and then I realize I use black pepper and bay leaf at this point as well. Okay...so it's okay to add Spanish seasoning like whole cracked black pepper, bay leaf, ground cumin, dry oregano, ground coriander (about 1/2 tsp each)...just not the salt until the end. This is where I add the 1/2 cup Dehydrated Onion, 1/4 cup Freeze Dried Mixed Peppers, Fair? You can also add a whole onion, with the "paper" skin removed. Just whole in with the beans. It sounds strange, but a Mexican gal I love showed me that trick and it's great for adding onion flavor without adding any chunks of onion...if you don't want chunks. Just remove the onion after cooking, and discard. I've also done this with a whole carrot and a whole celery stalk when I just want to add the flavor. You can also just add the dry onion, garlic, or dry vegetables, again being sure there isn't salt. A little won't hurt, but it again, will take longer to cook the beans. Yes...I know there are a lot of people who add pig to the beans. Salt pork, bacon, ham...all add salt and a nice smoky flavor. Do what you want, it will take a little longer (by 1-2 hours) if you add a lot of the salted meats. Add 3-4 drops of liquid smoke and you don't have to add meat at all. For black beans, I also add a dash of allspice, believe it or not, I really like the flavor in black beans.

Step 3:
Simmer 1 1/2 hours on stove top or 2 1/2 hours on high in the crock pot (3 hours in the solar oven). If you cook them on low temperature, it will take 4-5 hours. If you cook stove top, you may need to add additional water, be sure it is very hot, or the cooking time will increase. Yes you can  Pressure Cook  beans...they take 20 minutes that way, but that's another lesson.
Step 4:
Season. When cooking time is up, check to see if beans are soft before you add the Real Salt  salt and any additional Chef Tess All purpose Seasoning . . . If you want to add tomato powder or any  tomato products, now you may do so if  and only if the beans are tender.
  Continue to simmer a few minutes.
Now this next part is me. Totally me. I love garlic in my beans. I love a very pronounced flavor of garlic in my beans, so I add it last. Fresh pressed, two cloves in my pot at the end of cooking. If you want a hint of garlic, but not a bold statement, then you can add fresh pressed at the beginning of cooking.

This is what we end up with.


Homemade beans on a homemade tortilla...is dinner for pennies. It's not fancy, but it may not be fancy you need. It may be just making it to the next paycheck without feeling deprived of good food. This my friends, is my gift to you. Enjoy a few more dollars back in your pocket. Fire up the crock pot or Global Sun Oven .
Oh, and one last note. Because beans are so high in protein, at the right temperature they are the perfect breeding ground for food born illness. Please be sure to cool them quickly. I put my beans in smaller bowls and leave the top vented when I cover them with foil so they will get cold quickly in the fridge. If you freeze, be sure to cool them in the fridge first and then transfer to the freezer, as to not overwork your freezer, and keep the beans at a safe temperature. One pound of dry beans will usually yield about 7 cups of cooked beans! That's enough for a family easily! Serve that with Homemade Rice-Y-Roni Mix  or regular rice...and you've done it. Dinner on the cheap.


There you go.

Oh. One last thing. How do you store beans?


Storage Conditions from THRIVE:
Temperature: Storing THRIVE at a high temperature can significantly increase the speed that calories and vitamins will degrade over time. In the correct storage container, low-moisture foods such as THRIVE can be stored at room temperature or cooler (75 degrees Fahrenheit or lower) and remain nutritious and edible for years. Our stated shelf life assumes that the product will be stored in optimal conditions.
Humidity: The affects of humidity on a closed can are caused by heat and very similar to the affects of high temperature (see above). High humidity can corrode the cans and in some cases even cause the cans to leak. Areas with high humidity can reduce the opened shelf life of the product. As humidity varies with location please use your own discretion to prevent possible sickness from eating spoiled food.
Damaged Container: Minor dents in the center of the can are usually just a cosmetic issue. However, a can that has been dented near or on a seam can have a compromised air-tight seal and allow oxygen to enter the can. If this is the case we recommend using the dented can within the specified opened shelf life, rather than closed.
The best way to maintain the highest quality of your THRIVE products is to take care of them. If you intend on storing your food for the sealed shelf life, store the cans in a place that is not open to elements such as water, light, and air. Take care of it. Don't expose it unnecessarily to the elements. Also, be sure to keep the temperature and humidity low and even. Under these proper storing situations your THRIVE will maintain its delicious taste, natural coloring, and proper nutrients.
View shelf life on all THRIVE Click here 

Monday, April 11, 2011

Chef Tess Homemade Gourmet Chocolate Cake Mix


It's Mix Monday! Oh I love exploding myths and making convenience foods from scratch. Why is it? Why do I love it? Well...perhaps it's the sweet stream of email flowing to my heart thanking me for saving family budgets around the world. Literally. It's so highly motivating to get a thank you note. It warms the coggles of my heart. If you come down to the store, we will have copies of this week's recipe handy for you to take with you all week long. Isn't that cool? We'll trying to offer you a new food storage recipe every week. Speaking of recipes...

How many recipes call for a box of cake mix? Well in America anyway I've seen whole books written on the subject. They're books that doctor a cake mix into a lot of other stuff. However...what if the person making the cake or doctored mix had some crazy stipulations? I do. I want the mix being made with all natural ingredients, from scratch and things most people have access to. I want it made to taste wonderful without adding a lot of chemicals to my diet. Yikes...did I just say "diet" in blog entry about chocolate cake? Oh the irony of my existence is sometimes scary.

You will need some very high quality vanilla. It will still make a very impressive cake. If this recipe looks familiar, It is in fact an adaptation of the Chocolate Toffee Buttermilk Cake Mix. A simple form of that cake with some subtle changes.
The texture is still perfect. You will need a digital scale to make this mix or to be very accurate in your measurements.

Chef Tess' Homemade Gourmet Chocolate Cake Mix
yield 18 cups mix (4 1/2 mixes total)
2 cup  Powdered Butter butter
6 cups (1 lb 11 oz) all purpose White Flour 
3 cups (11.5 oz) baking cocoa (Hershey's available at the Preparing Wisely store)
1 cup ( 4.5 oz) non-fat milk powder Soy Milk 
5 cups(2 lb) granulated sugar
4 tsp Real Salt  
1/3 cup (2 oz) baking powder Baking Powder (Aluminum Free)  
1T double strength vanilla ( or vanilla bean paste)
1 tsp ground cardamom
1 tsp cayenne pepper

To prepare mix: In a large 3 gallon or larger bowl, combine the powdered butter,  flour, cocoa, dry milk
sugar, baking powder and salt, cardamom and cayenne very well.  (My Yellow Homemade Cake Mix) Divide into quart size bags. 2o oz of mix equals one cake mix.


This is almost exactly 4 cups of measured mix.
To bake:
Combine with 3 eggs
1/3 cup oil
1 cup water
200 strokes by hand or 3 minutes medium speed.

Bake time 350 degrees:
Pan size: 2 8 inch 33-35 minutes
2 9 inch 28-31 minutes
13 by 9 inch 32-35 minutes
bunt 38-43 minutes
24 cupcakes 18-21 minutes
High altitude: stir 1/4 cup all purpose flour into mix. Mix as directed.


Ganache Glaze:
1 cup cream
1 lb chopped high quality chocolate (we used Guitard)
1/4 tsp hazelnut oil
1/4 tsp fresh ground cinnamon

Boil one cup of cream in a sauce pan and pour over the chocolate. I added 1/4 tsp hazelnut oil, 1/4 tsp cinnamon, 1/8th tsp ancho chile powder...and blended until smooth. When chocolate is melted completely and the glaze is smooth, drizzle over one inch squares of baked cake.
These where double layers of cake with peanut butter filling...

There you go. Chocolate Cake mix. All natural.  My Yellow Homemade Cake Mix is another very good one to make.