Thursday, May 26, 2011

Canning Homemade Salsa


Thursday, June 2nd, 6:30 PM I'll be teaching a 
Basics of Home Canning class with  at Preparing Wisely
(144 S Mesa Dr, Mesa, AZ) 

I was on on Valley Dish  Tuesday making Skillet Enchilada Casserole . It's not only awesome in the Dutch oven while camping, but also amazing any night of the week.  I made the skillet meal using some of my homemade roasted tomato salsa, I thought it would be perfect to share the recipe here today! What do you think? Salsa season? Um yes!  Especially since the salsa I love and use has been completely depleted  by my salsa freak  adoring husband. Normally that is okay, but when I'm thinking I have a certain ingredient only to find it snorted down and gone...well let's just say I was a little flustered.  I needed to make some anyway, right?! Okay. Perk for you! I'm sharing the recipe. See...something good has come from Ace loving salsa...besides a tortilla chip famine. 
 Remember when I was hard core working on Organic Tomato Farming with Jim and I had a bazillion of these? Well, I think we're heading that way again.  If you don't have access to tons of tomatoes you grow personally, there's always the farmer's markets and local veggie stands. 

I came up with a recipe back  that made Ace literally drink bottles of salsa. He's a salsa boy. Honestly I couldn't decide if I wanted to share the recipe here on the blog or save it for bottling and selling across the country or at farmer's markets. Um...yes, we like it that much. However, I think it's safe to say that I can share a version here that's so close it's almost it...but not give away all my tricks, right?  It's a medium heat salsa I custom designed for Ace who doesn't like a lot of cilantro in his salsa. I'm a cilantro girl. I like a lot of chunks in my salsa too, but if you prefer a smoother salsa, you'll need to puree it. Ace also doesn't like, ironically, a lot of peppers in his salsa, so this one have very few. I roasted my tomatoes in the solar oven and then finished cooking the salsa on the stove. 

 Home Canning Safety 101 is a good place to start if you've never done any home canning. You'll need some equipment for this if you want it to be safe to feed to your family after sitting on the shelf.  


Chef Stephanie Petersen's 
Roasted Tomato Fajita Salsa

6 lb  blanched tomatoes , peeled half pureed, half rough chopped
2 medium onions, diced (1T olive oil)
1/4 cup minced garlic
1/2 cup roasted mild Hatch green chiles, peeled and seeded
3/4 cup apple cider vinegar
1T fresh cracked black pepper
2tsp fresh ground coriander seeds
1T salt
2T dry cilantro

Directions:
In a heavy 2 gallon stock pot over high heat. Add olive oil. Put onions in pan. Do not stir for 5 minutes until one side of the onions are very dark brown (as you would for fajitas). Add the garlic and cook 2-3 minutes.  Add all remaining ingredients. Simmer 20 minutes uncovered until thickened. Place salsa in sterile canning jars with 1/2 inch head space. Process 15 minutes for pints and 20 minutes for quart jars.


Hide them from Ace.  Share them with the ones you love. 

 There you go. If you go camping often, make the Enchilada Tortilla Casserole in the skillet. Tuesday's show recipes are here. The enchilada skillet meal is amazing for the fact that it's fast, easy and daggumit...a freakin' awesome family favorite!  Anyone can make it!  

Wednesday, May 18, 2011

Homemade Veggie Dogs and Sausages (Wheat Meat basics) Using Vital Wheat Gluten

Is it possible to make homemade veggie dogs with great flavor and less sodium than the commercially prepared pre-frozen counterparts at the grocery store? We covered the basic steps for making seitan, but if you missed that post, please look here: Meatless Wonders 101 (Wheat Meat or Seitan) We are using the same basic ratio of 1 1/2 cups Vital Wheat Gluten


 to 1 cup water with 2 tsp Low Salt Stock Base dissolved in it (concentrated vegetable stock if you're vegetarian). I personally prefer the ham or beef base for the hot dogs.  For added color I often use 1T paprika and 1T Pero® Caffeine Free All Natural Beverage. I've found the caramel color to be fantastic by adding just a few teaspoons of the powder. I add 1 tsp liquid smoke to the stock as well as 2 tsp cracked black pepper, 1T minced garlic, 2T minced onion and a 1/2 tsp sage. Combine with the liquid.

See how dark it gets? Normally light colored gluten will look grey when cooked. I've never seen a grey meat that really appealed to me. Ever.
Cut the gluten ball into 4-6 pieces, depending on the size of the veggie dogs you prefer.

Lightly oil a foot long piece of foil. Squeeze the gluten into a thin log, then roll tightly in the foil, twisting the ends.
This recipe makes 4 "bratwurst" size sausages or 6 hot dogs. Simmer on high in a crock pot 2-3 hours. Or it also works in a solar oven! Isn't that awesome?!  I make 20 at a time in my gallon size crock pot.
When finished cooking, allow to cool. You can brown the sausages in a little barbecue sauce on the stove, or place the unwrapped sausages in freezer bags and freeze for later use.
Slice thin for pizzas or for breakfast burritos.

Other Sausage flavors
(If you are vegetarian, feel free to use vegetarian stock as the liquid and omit the bullion) All the dry ingredients are added to the dry gluten before mixing. I use the low sodium MSG free bullion if I use it instead of fresh stock:
Pepperoni: Use 2 tsp beef or vegetable bullion, 1 tsp liquid smoke or sesame oil, 2 tsp cracked black pepper, 2 tsp dry oregano, 1 T minced fresh garlic, 1T paprika (for the color...or you can use dark coffee or pero.)
Mild Summer sausage:
Use 2 tsp ham or beef bullion, 1T mustard seed, 1 tsp cracked black pepper, 1 tsp liquid smoke, 2 tsp powdered sage, and 2 tsp minced rosemary.
Breakfast sausage:
Use 2 tsp beef or pork bullion 1T minced fresh rosemary, 2T maple syrup(mixed with the liquid), 1/4 cup dry onion, 1 clove fresh pressed garlic and 1 tsp pero or instant coffee for color.
Shrimp sausage for seafood chowders:
4 tsp shrimp bullion, clam juice for the liquid, 1T dry minced parsley, 1 T dry chives, 1 tsp garlic, 1 tsp lemon zest and a dash of Tabasco.
Southwest Roasted Chile Sausage:
4 tsp chicken bullion and 2 tsp each:ground cumin, new Mexico Chile powder, cilantro, lime zest 1 tsp liquid smoke.
Italian Fennel Sausage:
2 tsp pork or beef bullion, 1/4 cup minced onion, 1 1/2 tsp fennel seed, 1 T mustard seed, 1 tsp all purpose Italian Seasoning, 2T minced garlic, 1 tsp ground pepper.
Greek Sausage for gyros:
2 tsp beef bullion 2 T garlic, 1T fennel seed, 1 1/2 tsp dill seed, 1T dry mint, 1T fresh minced rosemary, 1 tsp liquid smoke, 4 tsp pero or postum granules, 1/2 tsp red pepper flakes.
There you go.

Wednesday, May 11, 2011

33 year old Mountain House Beef Stew (A Taste Test...)


I have to admit something right here folks...I chef Tess, ate food that was put in this can by Mountain House when I was four years old. I'm not 15. Try 37.  Simple math aside...that's a little scary.  Not me being 37...but the freeze dried stew being 33 years old. Let's not get into my age here...because it appears I have broken the unwritten law of never actually revealing that holy number.  While we're all about admitting deep dark secrets... I have also have to admit that I was a little nervous about eating said "food-item". I thought that freeze dried beef was a relatively new thing but Troy and Tracey down at the store brought this to my attention and I am happy to report that I am now enlightened and... still alive. I'm not blind or puking my guts out. I feel great. I may give it a few more days...No, really. That's the point. I'm not kidding when I say it either...it was actually not too shabby.
Ingredient list...
Looking at the actual contents of the can surprised me a bit. I was expecting a lot less color. I was also expecting a lot less flavor.

I added the customary boiling water.
Put a lid on it. No comments from the peanut-gallery about me and "putting a lid on it."
Waited the customary 10 minutes...and look.

 Taste and texture were like regular beef stew. Not too smooshy. Flavor was mild. Perfect for most regular folks who don't like a lot of "fluff" and snazzy new flavors. It was straight forward son-of-a-gun stew. Who knew that 33 year old freeze dried stew would still not only cook fine, but taste good too?  Makes me want to buy some for the next 30 years! Mind you...in 30 years, I will never admit that I am *still* 37. You can quote me. I'll be just as well preserved as that stew...I can only hope.
There you go.

Monday, May 9, 2011

Homemade Gravy Mix (gluten free)


It's mix making Monday and I have a sneaking suspicion this is one that can really save a lot of people some hard earned cash. How much do you pay for gravy mix? It's so easy to make and so painfully cheap that once you see it, you will be shocked! It only takes a few minutes to make several of these gravy mixes and from all the sauce and soup classes I have had, this is the one mix that people say they use the most. Home basic gravy is a great skill to have. I've seen a lot of money go down the drain for those store bought convenience foods like gravy mix. Why? Most of them have flat flavor, no frills. If you look at the ingredients list, it seems like it could be much shorter. Am I right? This mix I make is still loaded with good complex flavors, but it's also quick. It's a good marrying of basic meets a bit of gourmet. My gravy isn't super thick like pudding. It's thick enough to coat the back of a spoon nicely. If you want thicker gravy, you will need to double the flour. For the best complex flavor I add my all purpose seasoning in place of the pepper, thyme, and celery seed (there's a lot more spices and herbs in mine). I always use the bay leaf. It not only adds great flavor, but is a natural deterrent for bugs. Not that it will be sitting on the shelf that long. If you prefer to use prepared stock in place of the bullion, it will be awesome! I use ultra gel because it is a sauce I can freeze well in casseroles. 

Chef Tess Basic Gravy Mix (gluten free)¼ cup Ultra gel
3T beef or chicken stock granules, MSG free low sodium
2T onion powder
2T garlic powder
1/2 tsp ground celery seed
1/2 tsp black pepper
1 tsp ground thyme
1 bay leaf
Mix Directions: Place all ingredients in a half pint seal able jar. Repeat as needed however many mixes you want to make. Please note, this mix makes 8 cups of gravy.
To prepare:
Whisk mix with 2 cups milk or water (broth or stock if you omit the bullion), when smooth add 6 more cups of milk, water or stock. Simmer over medium heat stir occasionally 10-15 minutes.

Individual smaller gravy:
1T ultra gel
2 tsp bullion (MSG free)
1T onion powder
1/8 tsp ground celery seed
1/4 tsp ground thyme
1/8 tsp ground black pepper
1 bay leaf
To prepare small batches:
Whisk mix with 2 cups stock or milk in a medium sauce pan with a heavy bottom. Simmer over medium heat 5 minutes.

Get the printable pdf version of this recipe here.

Saturday, May 7, 2011

Corn Tortillas Using Instant Masa

If I don't buy the fresh masa dough or make the fresh masa dough, I generally use the instant method. It's called... Instant Corn Masa Flour for tortillas.  I don't know if I'll ever use it again after making the fresh from the Fresh Corn Masa this week! However, in fairness, I will probably still have busy weeks and make it using masa harina (corn flour).

4lb bag makes a very large quantity of tortillas...so it saves us a lot of money. Honestly though, the taste of homemade corn tortillas is absolute heaven. I have never once had a corn tortilla in a restaurant or off a grocery store shelf to match the tenderness of a homemade corn tortilla...ever. It usually takes about 15-20 minutes to make 16 tortillas from scratch. I do that while the meat for the tacos is cooking. It's quick dinner.

This recipe for the corn tortillas is from Doña Masita. MASECA - Tortillas

For the Dough:
In a bowl mix 2 cups loose instant masa, 1 1/4 cup water and 1/4 tsp salt until it is all incorporated and a smooth dough is formed which doesn’t stick to your hands.

If the dough feels dry, add teaspoons of water (one by one). Once the dough is ready, cover with a wet towel so that it does not dry out.

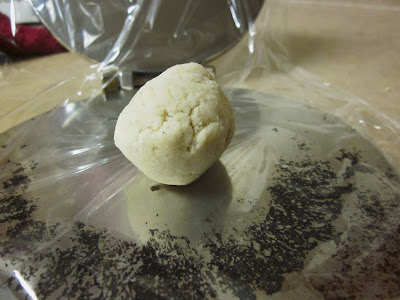
Divide the dough into 16 equal portions and form little balls.

Cover with a damp towel to keep moist.

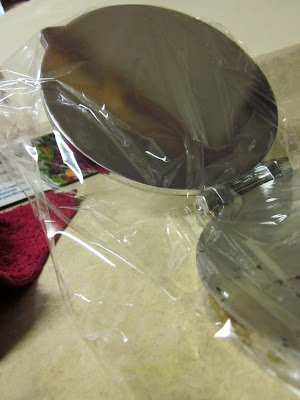
Flatten each ball between two sheets of wax paper, using a press for tortillas and start making the tortillas. You can use parchment paper or heavy plastic wrap as well. You don't have to use a  Tortilla Press , but it takes a lot less time and energy to use one. I highly recommended it. 

Hello you lucky dough ball. Brace yourselves...

Once the tortilla is ready, cook on a hot griddle for 1 minute each side, or until the tortilla fills with air. Look how cool they look...
Again, one minute on each side is all it takes to cook them. On a large griddle I can get eight at a time going!
I keep the tortillas in a nice covered tortilla warmer until we're ready to eat.
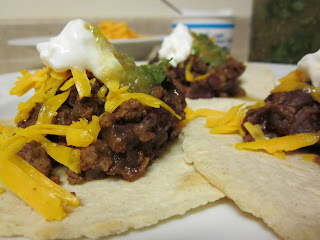
If you decide to fry them to make chips, be prepared to let them cool completely first. Also, they make amazing enchiladas, tostada shells, taco shells, quesedillas...you name it. We went ahead and used some fresh salsa verde.With home grown cilantro...also still growing nicely in the garden. Be jealous. I walked out barefoot and gleaned some from my cilantro forest. Arizona is amazing for year round gardening. I'll be calling you in July when I'm crying in my 200 degree kitchen.


Cheese is optional...but always loved. Just like me.

There you go. Make yourself some corn tortillas!

Tuesday, May 3, 2011

Corn Masa and Corn Tortillas from Organic Yellow Corn

Troy down at Preparing Wisely thought I should try out one of our   25 lb Bag Organic Yellow Corn. Yes Sir. I aim to please. I was happy to take it home. Honestly, this is some beautiful stuff.


While working with this  25 lb Bag of corn. I've learned a few corny facts. Did you know there are more than 400 kinds of corn?! Oh my gosh. I for one have been a little lax in my use of the golden nuggets. How about you? I also was interested to know that I needed something to help digest the corn. To make the tortillas you will need to purchase something traditionally called "slaked lime", but chemically called Calcium hydroxide. Tory had some that took home too.


It's available for 5$ a lb here.  When corn is not treated with the lime, it has an outer husk-fiber-type stuff that makes it very difficult to digest. The dough will also not hold together at all. It must come off.  Place 8 cups of corn in a 3 gallon pot with warm water and 3/4 cup of lime. Cover with 3 inches of water over the corn.

 Simmer at least 45 minutes.   It will bubble and foam quite a bit.
 What really surprised me was how bright orange the corn got at first.
After 45 minutes it will start to split and the outer skin will start to slip off rather easily. Almost slippery. Run the corn under a forceful stream of water. Rubbing between your hands.

This is how you wash the corn...(I did a short video)

As you rinse you will see a lot of this clear film left in your colander . It is the inedible portion of the corn.
Separate the edible corn from the outer fibers.


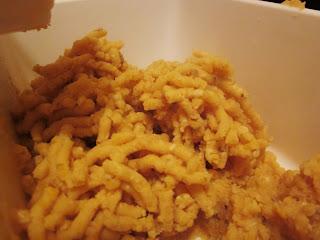
 Run the edible portion through a meat grinder fit with the finest setting.

 I run it through once...
It looked pretty course at this point so I ran it through again with a little water.


 It should hold together like this.


The dough will look like this.
 With a tortilla press, between two pieces of wax paper  and place on a hot lightly oiled griddle.
 Cooking 3-5 minutes.
Serve warm.


There you go. Oh. Masa doesn't keep very well so if you don't plan on using it within a day or so, put the unused dough in the freezer and use within a month.