 I wanted to show a little bit of fun with something that seems to be one of those "lost arts". English Muffins. I promise if you can make bread dough, you can make these. It's not rocket science. I have found a few tricks and have also found this recipe to be pretty good for light fluffy muffins. Auntie Em sent me a recipe book that had this recipe in it, and the directions. My mouth dropped when I saw how easy they were. Why had I not been making them for years?! So, I started practicing. I love this recipe, I do however also use the overnight started bread dough for these too, and it works really well for great flavor. Make the dough as usual and when it comes time to shape into loaves, shape and cut into English Muffins instead.
 Cinnamon Raisin English Muffins
3 cups bread flour (if you use whole wheat, add about 1/4 cup more liquid)
1 teas. Salt
1 T. Dry yeast
1 teas. Sugar
1 cup Warm milk (I have a friend who uses buttermilk...mmmm)
1/2 cup raisins (optional. apparently some people think raisins are "of the Devil")
1T cinnamon (I add clove, ginger, and nutmeg as well)
2 oz. Butter, melted
Sift the flour and salt into a bowl and leave in a warm place. Dissolve the yeast and sugar in warm (105 F) milk (M−Waved). Let froth, then mix in the butter. Stir all the liquid into the warm flour and beat well until smooth and elastic. More complete directions for forming dough and proofing can also be found in the overnight started bread tutorial. Cover and proof in a warm place for 50 minutes or until doubled in bulk. Turn onto a well−floured board and
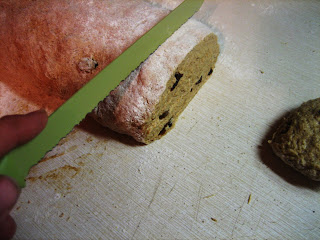
knead, working a little more flour if necessary to make the dough easier to shape. Round up the dough, roll into a thick sausage shape. I use a lot of flour to coat these. Some people don't like to do it that way but I think it makes them look really cool...and not stick to my counter tops. Always a plus.
 Using the sharpest knife you have, slice into 8 to 10 portions, each about 1 1/2
to 1 3/4 inch thick. Shape each one into a round with straight sides
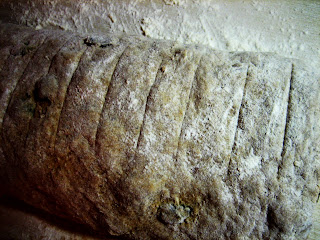
 I usually score my bread with the knife so I know what the heck I am doing. Really scientifically calculated too(...oh come on). It sounds smart. I just eyeball it. It should make about 10. I doubled the recipe so if it looks like I got a ton... I did. My kids love them.
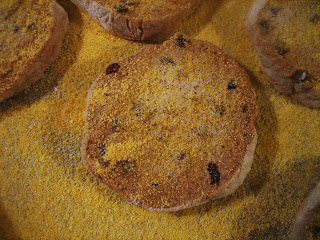
 Put onto a greased baking sheet. Personally, I love the cornmeal coating so I lightly (very lightly) mist the pan with a little oil and then sprinkle it with a good coating of cornmeal. Then I put some cornmeal on the top of them too. Cover (use plastic wrap) and put in a warm place to proof for 30−40 minutes or until springy to the touch. Leave room for expansion and be careful not to over−proof, as the muffins will get flabby and lose their shape. Big words for saying..."don't let them get super pooofy". I know a lot of things that get too poofy and lose their shape. NO comments on my thighs. None. Random moment there sorry.
 The cornmeal on top keeps it from sticking to the plastic while it raises. Sorry I didn't get a picture of the plastic wrap covering the muffins. You will just have to use your imagination.
 Lift the muffins carefully onto a cast iron skillet or a thick bottomed skillet (like the 12 inch Lodge 3 Quart Red Enamel Casserole Dish --I love mine...but it's blue or the Lodge Logic Deep Skillet would also work.) and cook over very moderate heat for 5-7 minutes until pale gold underneath. Turn and cook the other side 5-7 minutes as well. Moderate heat for me was medium heat (#4 on my dial) but every stove is different, so try not to get it too hot. It took me about 40 minutes to make all of mine. We made 20. Days like that I wish I had an electric skillet or something. However, it did make me think that if I was camping...I could totally make these since they don't need an oven!


