

I wanted to share a little from the class I co-taught today at Preparing Wisely . I was all about the Beginner's Pie Crust and gave some basics on how to actually make the pie. Troy Adair, amazing emergency preparedness guy of glory was there to teach some basics on how to turn a regular outdoor dutch oven into a baker for pie. I was most interested in learning myself how to know that the oven was the proper temperature for baking. Since, y'all know I'm a bit of a baking geek...right? Why bake it in a Dutch oven at all? You know, I'm all about alternative cooking methods and I adore solar baking all summer and winter, but I'm also looking at the fact that my son Little Man will soon be attending BSA camps. I'm getting my game on to cook in the rough...should I ever need to assist in that area. Plus, will I ever be sad I didn't know how to cook something another way? Nay. I dare say I will always be a cub master-chef...even now as I'm not a cub master any more. I can also do a yodeling goat on the mountain impression and sing,"Be prepared! Be prepared! This lesson must be shared..."
It turns out there is a very technical way of knowing the internal temperature of a dutch oven. We used the Lodge Camp Dutch Oven 14 Inch deep dutch oven. It was just about the perfect size for a 9 inch pie. To determine the temperature of the oven, you use what is called, "the rule of 4." If the oven is 14 inches, you subtract 4. You will need 10 coals on the bottom of the dutch oven and twice that many on top of the dutch oven to get the internal temperature to 350 degrees (preheating 20 minutes). Adding 5-7 minutes to the baking time on most items. Add two coals to the bottom and 4 to the top for every additional 25 degrees you want inside your oven. So...for 400 degrees we added 4 to the bottom and 8 to the top. Does that sound technical enough? It almost hurt my brain to do that much math.

Once hot, Troy used a metal hook to take off the lid, with the coals still on top:

Single layer pie crust for a custard pie takes about 25 minutes.
 Oh...this is important, we put the pie on top of a metal trivet inside the dutch oven so the bottom didn't burn. This also applies for most other pans you are baking in the dutch oven. Leave a little circulation space under the item's pan so it isn't in direct contact with the dutch oven. This is why we used the deeper dutch oven (5 inched deep instead of 3 inches deep).
 A fruit pie generally takes about 45 minutes to bake (50-55) in the dutch oven.
 The crust was golden delicious.

For the filling we used freeze dried peaches, raspberries and blueberries, reconstituted and lightly sweetened with agave. The general rule with thickening fruit is this: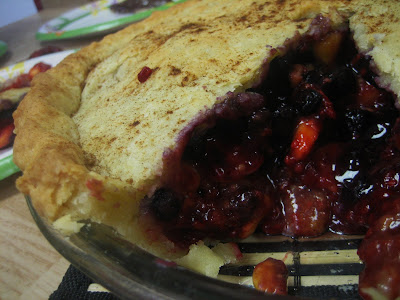 Now I'm ready to go camping! What about you?! Who wouldn't love pie in the mountains?

Once hot, Troy used a metal hook to take off the lid, with the coals still on top:

Single layer pie crust for a custard pie takes about 25 minutes.
 Oh...this is important, we put the pie on top of a metal trivet inside the dutch oven so the bottom didn't burn. This also applies for most other pans you are baking in the dutch oven. Leave a little circulation space under the item's pan so it isn't in direct contact with the dutch oven. This is why we used the deeper dutch oven (5 inched deep instead of 3 inches deep).
 A fruit pie generally takes about 45 minutes to bake (50-55) in the dutch oven.
 The crust was golden delicious.
For the filling we used freeze dried peaches, raspberries and blueberries, reconstituted and lightly sweetened with agave. The general rule with thickening fruit is this:
4 cups of fruit mixed with 1/4 cup corn starch or ultra gel and 1/4 cup agave nectar. We also added 1 tsp of Chef Tess Wise woman of the east spice blend.
 Now I'm ready to go camping! What about you?! Who wouldn't love pie in the mountains?
There you go. Dutch oven baking. We're starting with pie...but bread is next!


